8(800) 350-02-48
Free call in Russia
Sales department +7 (812) 612-30-03
Department of metrology +7(4932) 23-28-44
Design department +7(4932) 23-67-15
Production of our goods on the territory of the Russian Federation is confirmed by the conclusion of Ministry of Industry and Trade Russia according to expert opinion of Ivanovo Chamber of Commerce and Industry Read more...
- Tensile Testing Machines and Accessories
- Grips and Devices for Tensile Testing Machines
- Impact Testers
- Hardness testers
- TB 5056-02
- TB 5004, TB 5004-03
- TB 5015
- TB 5015A
- TB 5015-01C
- TBP 5013
- TR 5006M
- TR 5014
- TR 5014-01М
- TR 5043
- TR 5018M
- TR 5018MS
- TR 5018M-01
- TR 5018PA
- TRP 5011
- TRS 5009-01
- TPC 5019MS
- 2143 TRS-M
- IT 5010, IT 5010-01M
- IT 5038-01, IT 5038-02
- TV 5214A
- TV 5214-01C
- TVM 5215A
- TVM 5215AC
- UT 5021 PA
- UT 5021MS
- UT 5021M-01
- UT 5021M-01S
- 2124 TML
- TIR 2033 (Shore A)
- TIR 2033A (Shore A)
- TIR 2033 (Shore D)
- TIR 2033A (Shore D)
- Metallography Equipment
- Inprocess Testing Machines
- Machines for Testing Road and Building Materials
- Spring Testing Machines
- Friction and Wear Testing Machines
- Machines and Systems for Temperature Testing
- Portable Dynamometers
- General Purpose Dynamometers
- Standard Hardness Test Blocks
- Shoe testing tools
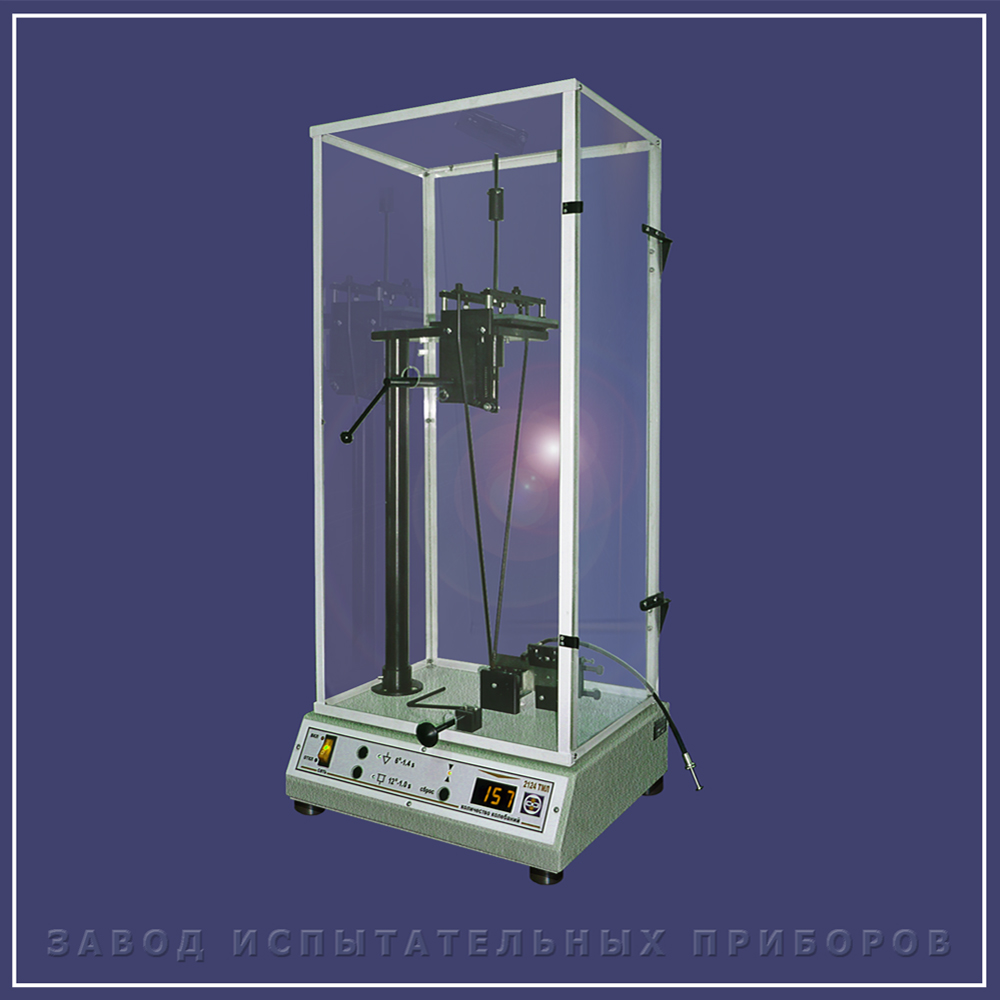
2124 TML
The device is designed to determine the hardness of coatings.
Principle of operation:
Based on the specified characteristics of the paintwork, the appropriate type of pendulum is selected and mounted on arresters. A test plate made of polished glass is mounted on the test table. The pendulum is deflected by a certain angle and fixed in this position, then released and makes free damped oscillations on the surface of the control plate.
From the moment the pendulum starts, the reading device starts to work, which turns off and fixes the measured value when the free oscillations decay to certain limits.
" glass number " — the decay time of the oscillations of the pendulum on the control glass plate. The control plate is replaced by the test sample, the tests of which are similar. The hardness of the coating of the sample is determined by comparing the decay time of the oscillations of the pendulum on the sample with a " glass number ".
Certificate on type approval of measuring instruments of ROSSTANDARD of RUSSIA No. 44543.
| TECHNICAL SPECIFICATIONS | ||
| Type of pendulum | A
(by Koenig) | B
(by Persoz) |
| Range of measurements of the number of oscillations of the pendulum | from 0 to 999 | |
| Mass of the pendulum, g | 200,0 ± 0,2 | 500,0 ± 0,1 |
| The average period of oscillation of the pendulum, s | 1,40 ± 0,02 | 1,000 ± 0,001 |
| Diameter of support balls, mm | 5,000 ± 0,005 | 8,000 ± 0,005 |
| The distance between the centers of the support balls, mm | 30 ± 0,2 | 50 ± 1 |
| The distance from the support plane to the end of the arrow, mm | 400,0 ± 0,2 | 400,0 ± 0,2 |
| The distance from the support plane to the center of gravity, mm | — | 60 ± 1 |
| The time to reduce the amplitude of the oscillations on the control glass plate when changing the deflection angles, s | ||
|
from 6° to 3°
| 250 ± 10 | — |
|
from 12° to 4°
| — | no less than 420 |
| Maximum power, W (power) | 50 (220V, 50Hz) | |
| Overall dimensions (length x width x height), mm | 295x320x720 | |
| Weight, kg | 13 | |

